We’ve been promised a paperless future for decades now and yet, despite smartphones being everywhere, there’s still a ton of paper around. To make things worse, at some point you are going to want digital copies of paper documents.
Usually this means trying to find someplace with a scanner, which is becoming a harder thing to do day by day. Thanks to the excellent quality of camera phones, people soon figured out that you could just take photos of documents with perfect clarity. However, it’s still a hassle to edit and organize these photos. Especially if you need to scan a document with multiple pages.
Table of ContentsLuckily Google Drive (Android & iOS) has come to the rescue. It’s essentially Google’s answer to iCloud and other cloud storage solutions. Google Drive is completely free, unless you need more than the base level of storage. Everyone with a Gmail account already has access to Google Drive. If you own an Android device, chances are that the app is already installed.

Google Drive is the heart of Google’s Cloud suite of apps. Google Docs, Sheets and other apps in the family all store their content in your Google Drive.
While you can upload the photos you take with a phone or tablet to Drive quite easily, the mobile app has a somewhat hidden feature that lets you scan documents like a photocopier. It automatically filters and formats the image for maximum legibility. Once you know where to go, this is a fast and simple trick you’ll use a lot if you have to deal with paper all the time.
It’s worth noting that the latest version of iOS also has a new document scanning feature in Notes, which works equally well in my tests. I’ll be writing up a separate review of that feature.
Assuming that you’ve already installed the app, the first thing you need to do is open it. If this is your first time opening Google Drive, there’s some basic, once-off housekeeping to do. You need to sign in to you Google account and then agree to any permissions the application asks for. These permissions allow the app to function properly. If you don’t allow any of them the app will still work, but some functions won’t be enabled.
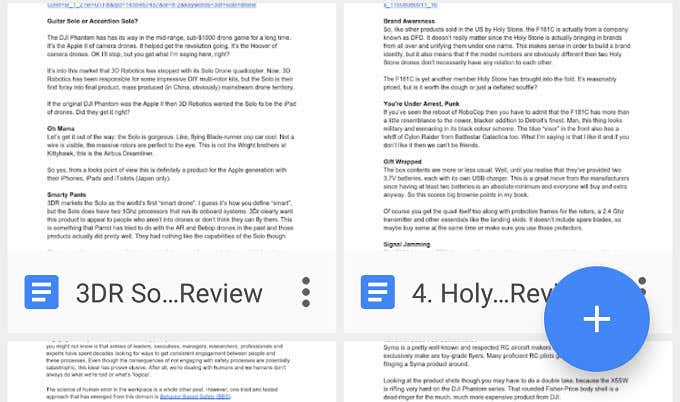
With that done, you should see the Drive home screen, along with any documents and images you already have.

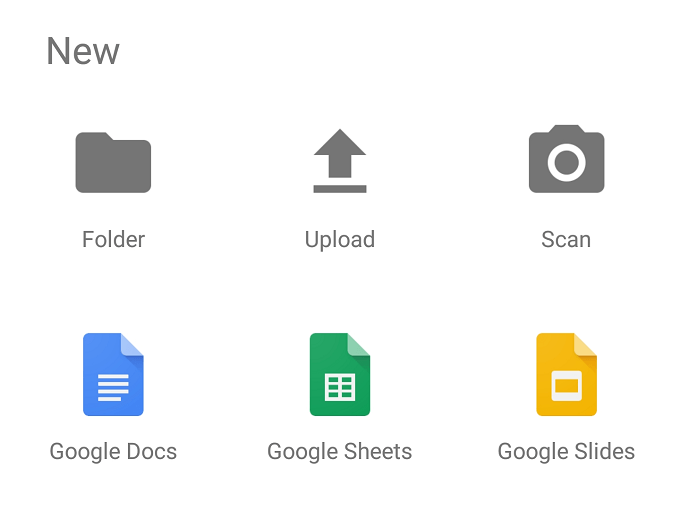
Tap the plus sign to create a new document. You’ll see a selection of choices.

Now tap on “Scan” to begin the process. If you’re on iOS it reads “Use Camera”. At this point you may be asked for camera permissions before you can proceed.

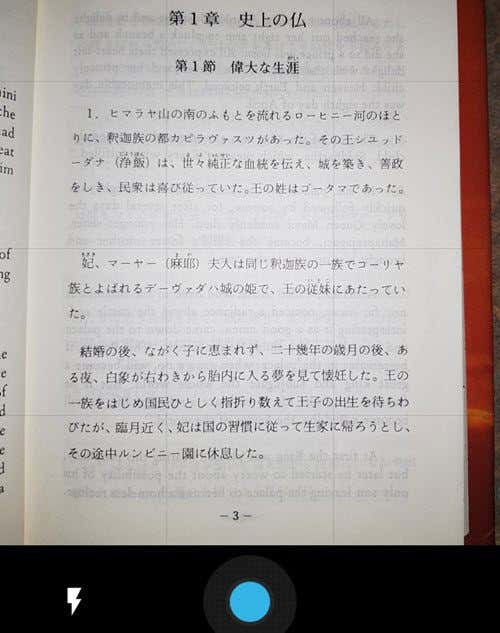
Note the grid overlay on the camera viewfinder. Use this to roughly align the document. If the image is too dark, switch on the flash by tapping the lightning bolt icon. When you are satisfied with the image, tap the blue button. Then you’ll be taken to this screen.

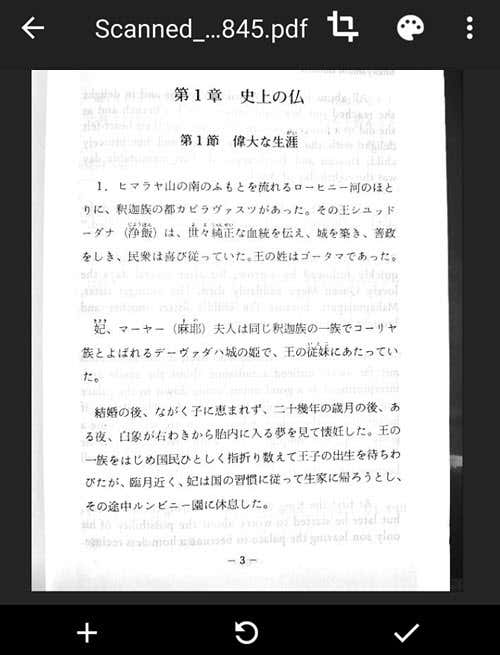
This is a preview of the scan. Notice how the app automatically cut out the background and straightened the image out? Pretty cool, right?
You now have three choices. If you are not happy with the picture and want to try again, tap the middle icon to try again. If you want to add a second page, tap the plus sign to add another page. If you’re happy and want to save the document, tap the check mark to finalize the document.
That’s all there is to it! The file will be saved as a PDF document in your Drive. You can then rename it, download it or move it to another folder. Now you can responsibly recycle the paper copy if you don’t need it anymore. How cool is that?
Founder of Help Desk Geek and managing editor. He began blogging in 2007 and quit his job in 2010 to blog full-time. He has over 15 years of industry experience in IT and holds several technical certifications. Read Aseem's Full Bio