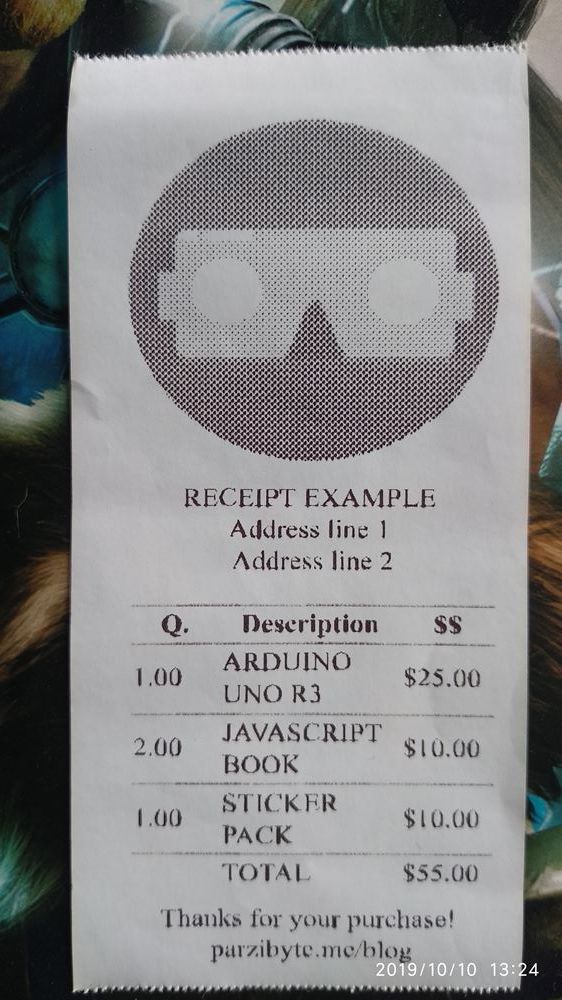

In this post I will show you how to print a ticket or receipt by using JavaScript (client side) and a thermal printer. At the end we will have a great ticket that looks like this:

Obviously you can change the font family, size, logo and so on. And remember: we will be using only pure CSS, HTML & JavaScript, no frameworks; though you can use any framework to render the content before printing.
You can see the demo here, and the full code on my GitHub.
First we have to write the HTML to print the ticket, in this case I will use a table to render the contents in a better way. Also, I’m using a image taken from pixabay. The code looks like this:
       Receipt example   Address line 1
Address line 2                   parzibyte.me/blog
Remember: this is a static example, you can always use a framework (client side or server side) to render the content in a dynamic way.
We have some CSS Classes, for example “centered”. We have a button to print the ticket as well and we are loading a CSS file to give style.
Now we have to give some style to our receipt. Here’s the CSS code:
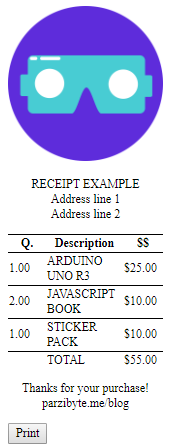
* < font-size: 12px; font-family: 'Times New Roman'; >td, th, tr, table < border-top: 1px solid black; border-collapse: collapse; >td.description, th.description < width: 75px; max-width: 75px; >td.quantity, th.quantity < width: 40px; max-width: 40px; word-break: break-all; >td.price, th.price < width: 40px; max-width: 40px; word-break: break-all; >.centered < text-align: center; align-content: center; >.ticket < width: 155px; max-width: 155px; >img < max-width: inherit; width: inherit; >@media print < .hidden-print, .hidden-print * < display: none !important; >>I’m giving a fixed width to each thing, this way we take a small space because the thermal paper is narrow. So far we have this:

Now we can print the ticket, or make the button to print it.
In CSS we have the hidden-print class, that class is used to hide the button when we print the receipt.
The JavaScript code is small. It is like this:
const $btnPrint = document.querySelector("#btnPrint"); $btnPrint.addEventListener("click", () => < window.print(); >);We are only calling window.print to tell the browser to print the document. When we press it, depending on the browser, a window appears, and there we can select the printer and some features.
Note: if you want to hide the dialog, you can use my plugin.
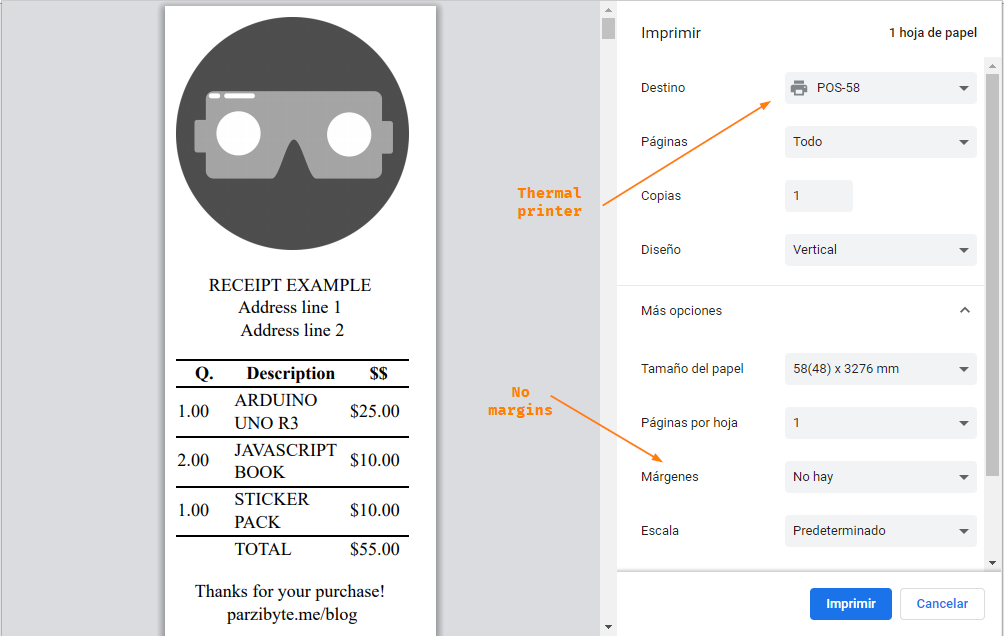
I am using Chrome, the thermal printer I have is a Xprinter 58, please note that I am not using any margins, so we can take the full space:

And when I click “Print” Chrome sends the receipt to the printer and we have this:
 Conclusion
In this way we can print anything by using a Thermal printer, CSS, HTML and JavaScript. The only issue is that we have to confirm the action, but I have developed the solution by using a plugin.
I am available for hiring if you need help! I can help you with your project or homework feel free to contact me.
If you liked the post, show your appreciation by sharing it, or making a donation